
Create a Lab
Overview
We’re going to look at how to get a lab up and running quickly. But first, a little background.
All the labs are done within the web console. There’s no need for an extra application like there was in VIRL (the precursor to CML).
In a lab, we add nodes (like routers, switches, and servers), and connect them together with links.
We then interact with them just like we would normally. They are VMs running within CML (yes, even if CML is also running as a VM).
Nodes are also persistent. So if, for example, we install packages on the server node and shut down the lab, the packages will still be there when we start the lab again.
Creating a Lab Topology
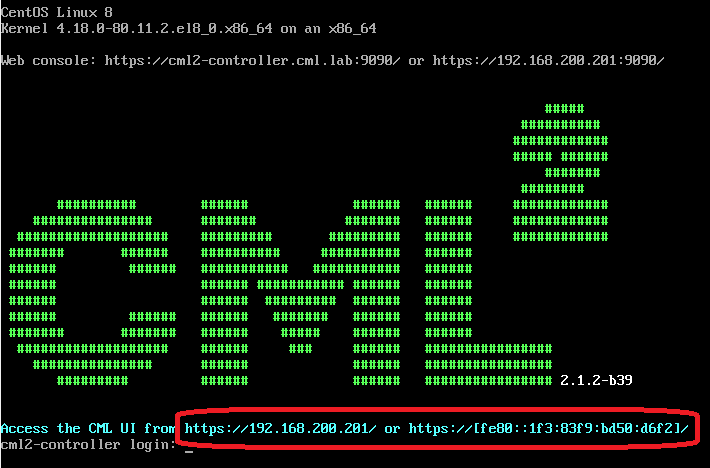
Start by browsing to the web console. If you’re unsure of the IP, look at the text-based console of CML, which will show you the IP.
Then, sign in using the admin account we created during install.
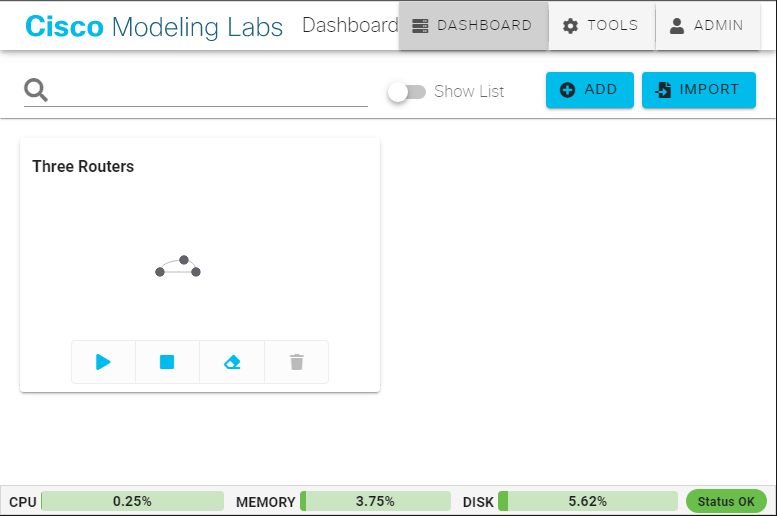
The page we’re in is called the Dashboard. This lists any labs you may already have. It’s likely blank at this time.
Click the blue Add button to create a new lab
The new lab is created, and we’re now in the Workbench view.
The lab name is at the top of the screen and defaults to the time you created the lab. Click the lab name and change it to something more meaningful.
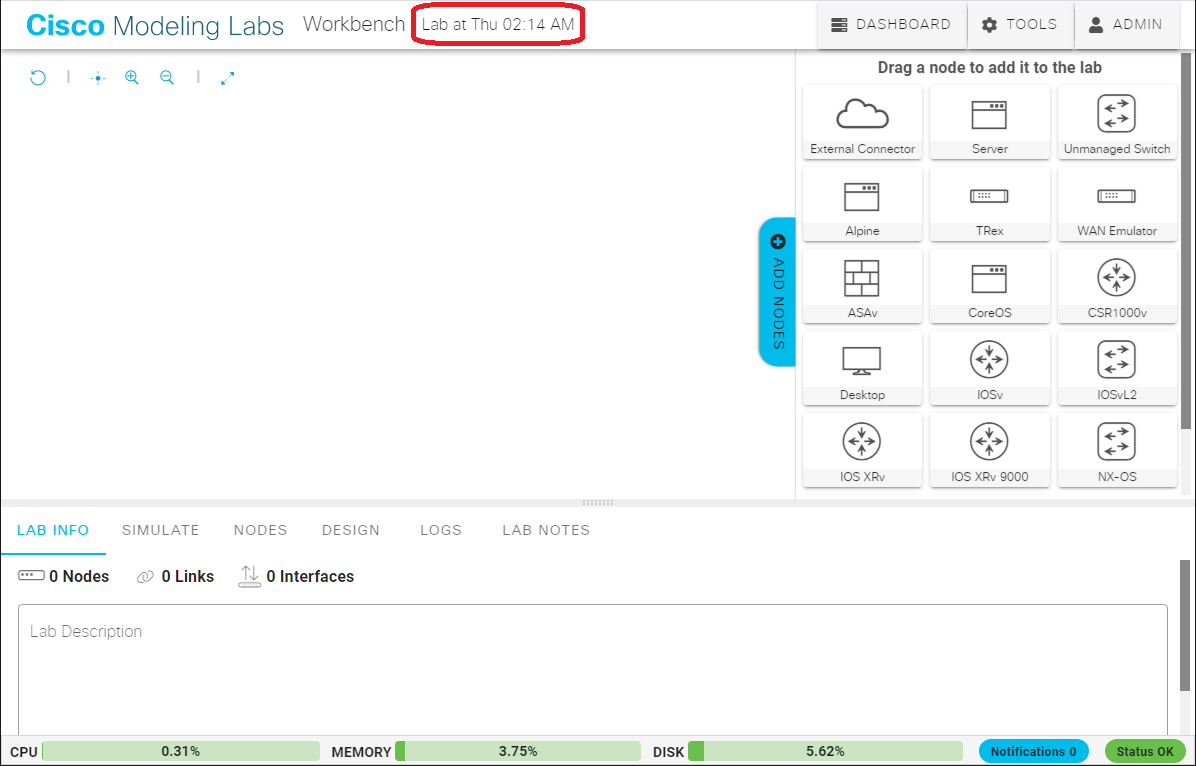
Over on the right you can see the Nodes drawer. This is open by default on an empty lab. You can open and close it as needed.
From the nodes drawer, select the IOSv node and drag it to the workspace. Repeat this to add a second IOSv node.
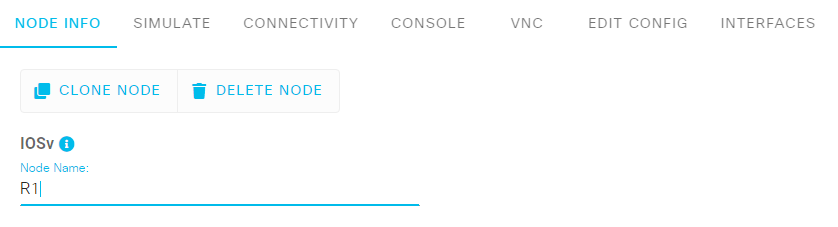
When you select the node, you see its properties below. In the Node Info tab, find the Node Name area, and rename this node.
Adding Links
Links can be added between nodes to simulate physical cabling.
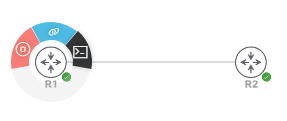
First, hover your mouse over a node, and you will see an Action Ring appear.
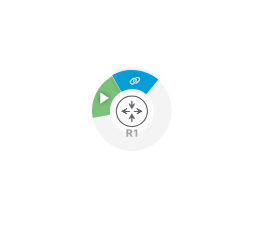
Click and hold the blue Link button. Drag this over to the other node. As you over it, the node and the link will turn green. If the node and link are red, this means that the node does not have any available interfaces.
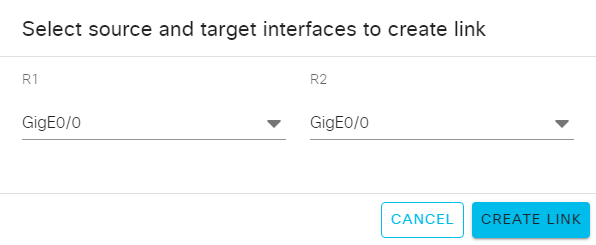
When you release the mouse the Interface Selection box appears. You can use this to select the interfaces that you want to connect together.
Leave these as defaults for now, and click Create Link.
Starting the Lab
So far we’ve just been creating a topology. We have to start it up to make it useful.
Make sure no nodes are selected. The area at the bottom of the screen now shows the properties of the entire lab.
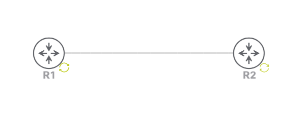
Click the Simulate tab, and then click Start Lab.

The nodes will have green ‘starting’ icons next to them.
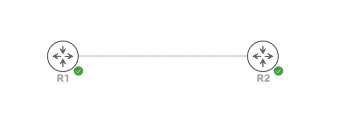
After a while, the nodes will have finished starting. You can verify this by the green ‘tick’ icon next to each node.
Accessing a Node’s Console
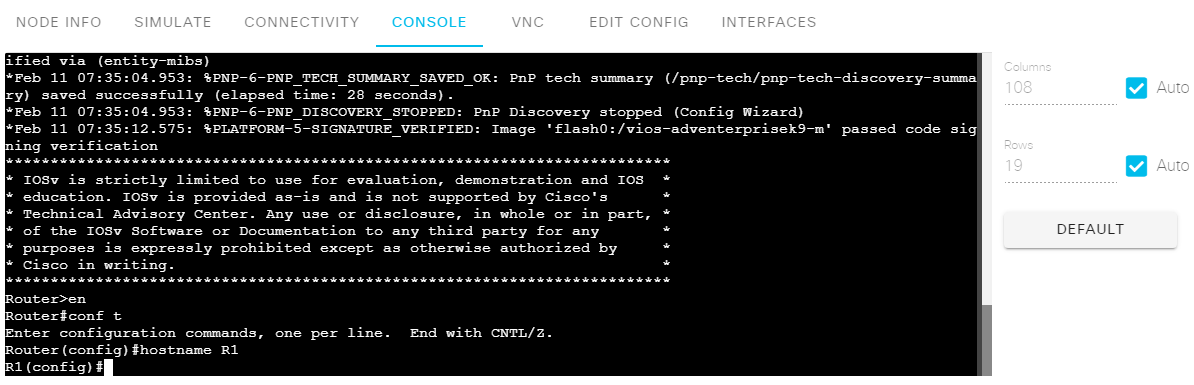
The router node will have a CLI console just like a real router does. We can connect to the console port directly within CML.
Hover the mouse over a node to bring up the action ring. Click on the new grey console icon.
This accesses the nodes Console tab. Click the Open Console button. You can now configure the router as you normally would.
This is a good opportunity to play around. Try configuring the interfaces that connect the two nodes, and get them to ping each other.
Ending the Lab
If we leave them alone, the labs will run indefinitely. So, we should stop the lab when we’re finished.
Make sure no nodes are selected, so we can see the lab properties.
In the Simulate tab, click the Stop Lab button.