
The REST API
API’s allow one application can communicate with another. While these used to be in the realm of developers, we’re seeing them more in networking too. Consider orchestration and SDN for example.
REST, or Representational State Transfer, is an API that works between a web server and a web client. This framework and its lightweight nature make it really useful to run over the network.
At a high level, a client will send an HTTP command to a server. This may be a request for information or a request for the server to do something. The server then sends a HTTP response to the client.
Tell Me More…
REST is not a protocol, it is an architecture. It describes a standard way for a web client and a web server to communicate. The client sends a request, and the server sends a response. The server may send the response in nearly any format. XML and JSON are common. One rule is that the server should not return HTML.
By the pure definition, we could use several different underlying protocols. In the real-world though, this will almost always be HTTP. Also, as REST is an architecture, it is language independent. As long as your language has web libraries, you can write REST applications.
Because REST is an architecture, there is no security or network features (like QoS) built in. Other layers provide these features. For example, if you want encryption, use HTTPS as the underlying protocol. This also makes REST easy to use across a firewall or IPS. After all, it’s just HTTP traffic.
Pure REST uses a ‘disconnected’ system. This means that the server does not track client state. The result is that clients must include a full request every time that they connect to the server. This suits the HTTP protocol well, which is also stateless.
In a real-world application of REST, sometimes the server will track some client state. This is noticeable with certain types of authentication, like OAUTH2.
Any response from the server may be cached. This includes caching on the client end, or by interim devices like a proxy server.
How it Works
REST is a resource based API. Every little piece of data that REST deals with is a resource. This covers things like user accounts, IP addresses, and load balancers. We use REST to get information about resources. We change them, update them, and delete them.
To achieve this, a REST client connects to a service with HTTP. In practical terms, a service is a URL hosted by a server.
Let’s look at an example. Consider the URL http://taco-randomizer.herokuapp.com/random. This shows us three things:
- We’re using HTTP to connect to the service
- The server is taco-tandomizer.herokuaoo.com
- The resource is called random
Go ahead and put that URL into your browser. Your browser requests information and the server responds with JSON data. The response from the server is a representation.
In this case, the representation is a random taco recipe from a site called ‘Taco Fancy’. If you’d like to see a better-formatted version, open up Postman. Put in the URL, set the method to GET, and send the query.
Technically, the representation can be in any format. Our example is in JSON. XML is also common. Really, any format is possible. It’s up to the client to know what to do with it.
We can send more complicated queries to the server. Consider the URL http://taco-randomizer.herokuapp.com/random?full-taco=true. Anything after the question mark is a parameter that the client sends to the server to modify the query. In this case, the parameter is full-taco=true.
The API documentation for the service should include a list of parameters you can use. For that matter, it should include a lot more. Such as how to authenticate, headers we can send and receive, and error codes we may face.
Authentication
Some services provide publicly available information and do not require authentication. They may rate limit queries to prevent abuse, but they’re available to use. We’ll have a look at some of these in the examples section.
Others contain privileged or paid-for information and require the client to authenticate. The main authentication methods are Basic Authentication, API Keys, and OAuth.
A server with basic authentication needs the client to send a username and password. The username and password are Base64 encoded and sent in the Authorization header.
As an example, go to a site like www.base64encode.org, and encode admin:Password. This will generate the string YWRtaW46UGFzc3dvcmQwMA==. When connecting to a REST service, send the Authorization header, with Basic YWRtaW46UGFzc3dvcmQwMA== as the value.
The problem with this is that Base64 encoding is reversable. Use HTTPS to encrypt the details while they are in transit.
With basic authentication, there are no cookies or tokens to track authentication state. Send the credentials along with every request.
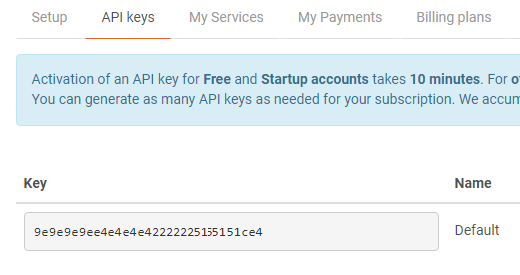
Some services use API Keys. This requires you to register your application with them. This is usually done on a web-portal of some kind. When registering the application, you get the key.
The key (AKA ‘developer key’) is a pre-shared key. It is a long string of numbers and letters.
Your application will send this key to the service. Some services require additional information like a master key or an account ID. The server will send back a token, which you keep and send to the server with each request.
The token will expire after a given amount of time. If the token expires, you will need to request a new one from the server.
OAuth is a complicated authentication protocol, with a few advantages. It’s still like API keys in many ways. You still register your application, get a key, and create a token.
The first advantage is when using third-party applications. Imagine that you use a social media site that has your data on it. Let’s say that there is an application which accesses your photos. Naturally, you don’t want to give the application your username and password. OAuth lets you use tokens instead to grant access.
And therein lies another advantage. You only want the application to access your photos right? OAUTH helps by introducing authorisation. Authorisation allows you to grant access to some resources, and not others.
The gritty details of OAuth are not as important to us as they are to the server-side developer. Still, it’s good to know how to use it from the client side. We’ll have a brief look at this soon in one of the examples.
Examples
Example 1: Beer Queries
Let’s get some beer. Head over to https://punkapi.com/documentation/v2 to see the API documentation. Have a browse through the docs to see what you can do.
Let’s start by opening Postman, and sending a GET to https://api.punkapi.com/v2/beers. If you’re not familiar with Postman, have a look at that tutorial first.
As shown below, this returns a list of beers and a lot of data in JSON format. You can see a list of resources, like id, name, tagline, and so on.
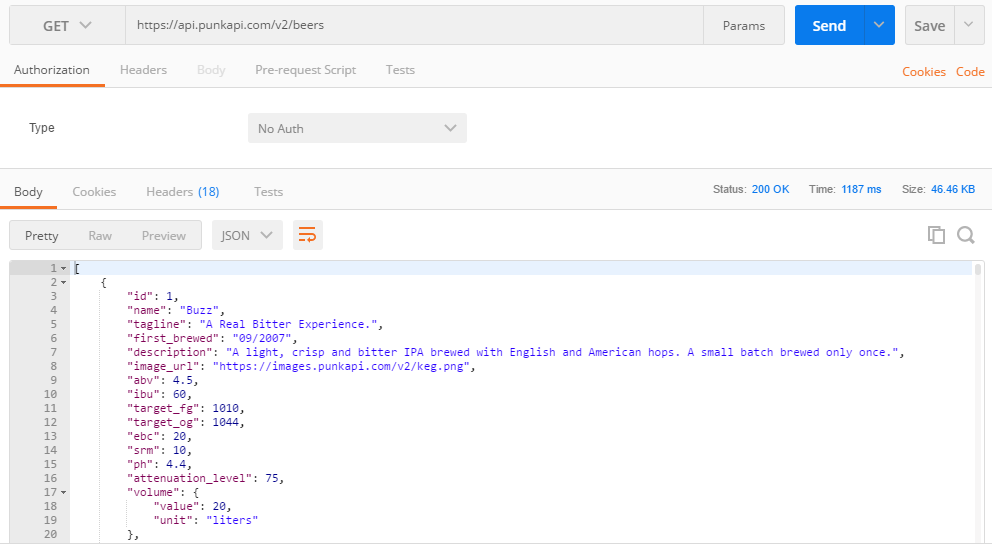
Try again now with the URL https://api.punkapi.com/v2/beers/1. As shown in the docs, this shows the beer with the ID of 1. Have a look through the docs, and find a way to return a random beer.
We’ll now try to send a query to get all beers with an ABV greater than 5. The docs tell us how to do this. We need to send a parameter called abv_gt and a value.
In Postman, enter the URL https://api.punkapi.com/v2/beers, and set the method to GET. Click the Params button, and enter abv_gt as the key. Set the value to 5. See how this changes the URL?
Send the query, and see the filtered result.

Here’s a challenge for you. Using the documentation, see if you can find a way to select a random beer, with an ABV less than 4.
Example 2: Currency Conversion
Next, let’s have a look at currency conversion from fixer.io. Go to http://fixer.io to have a look at the documentation.
Open postman, and send a GET to http://api.fixer.io/latest. This simple request shows us the latest conversion rates, based on Euros.
Now, add a parameter called base with the value of AUD. This shows the current conversion rates based on Australian Dollars.

Now it’s time for a challenge. See if you can find the conversion rate for GBP on February 1st, 2000. Further, limit the results to only AUD, EUR, HKD, and USD.
Solution
You need to send these three parameters:
- Key = base, Value = GBP
- Key = symbols, Value = AUD,EUR,HKD,USD
- Key = date, Value = 2000-02-1
The final URL for the solution is http://api.fixer.io/latest?base=GBP&symbols=AUD,EUR,HKD,USD&date=2000-02-1.
Example 3: Weather Forecast
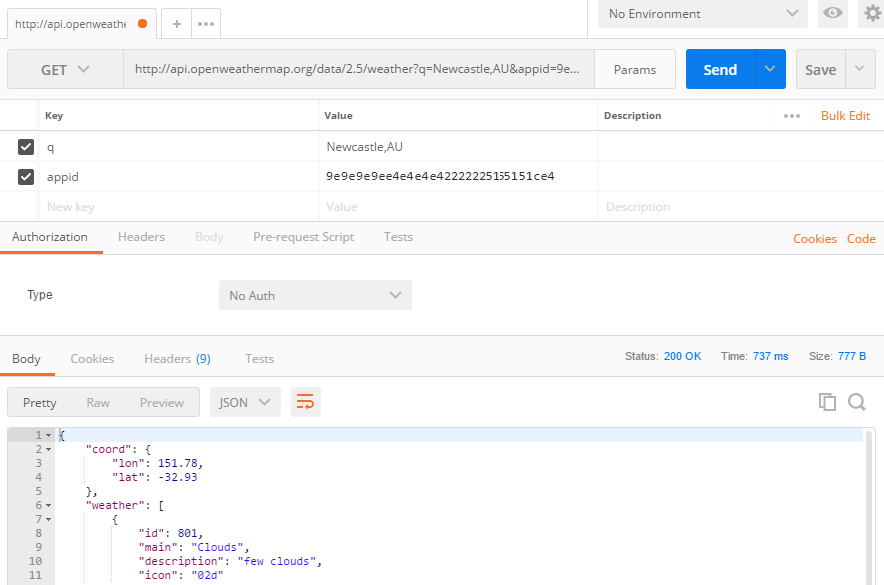
Now, let’s get the weather in Newcastle, Australia (not Newcastle, UK!) using openweathermap.org. Have a look at http://openweathermap.org/current for the documentation. Notice that we need an API Key for authentication.
Start by getting an API Key:
- Browse to http://openweathermap.org/appid#get and create an account (there is a free plan available)
- In the portal, click the API Keys tab
- Copy the key that’s listed (note, according to docs, this may take 10min after account creation to work)
Now, open Postman. Enter the URL http://api.openweathermap.org/data/2.5/weather. Add these parameters:
- Key = q, Value = Newcastle,AU
- Key = appid, Value = Your API Key
Send a GET request to see the weather.
Example 4: Pocket Authentication
Pocket is a tool used to save web articles to read later. In this exercise, we’ll look at the authentication portion of the Pocket REST API. Your challenge will be to finish it off.
The documentation is at https://getpocket.com/developer/docs/authentication and https://getpocket.com/developer/docs/v3/retrieve.
First, you’ll need a pocket account. Go to getpocket.com to create one. After that, we need to register the ‘application’ that we’re building. In our case, our application is just sending some queries from Postman.
- Go to https://getpocket.com/developer/apps/new.php, and log in with your account
- Enter a name and description for the application
- Select add, modify, and retrieve permissions
- Choose the web platform
- Accept the terms and conditions and Create Application
- You will be given a Consumer Key, like the sample shown below

Pocket authentication uses OAUTH. For this, we send the consumer key to the API and receive a token in return.
Start by preparing these headers:
- Header = Host, Value = getpocket.com
- Header = Content-Type, Value = application/json
- Header = X-Accept, Value = application/json
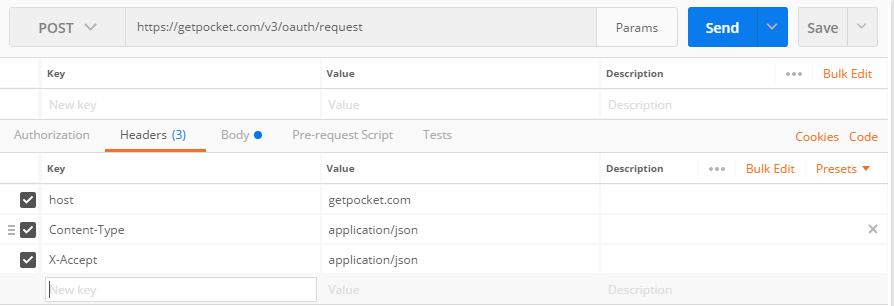
Now, POST the following body to https://getpocket.com/v3/oauth/request.
JSON Body
{
 "consumer_key":"XXXXX-XXXXXXXXXXXXXXXXXXXXXXXX",
 "redirect_uri":"https://networkdirection.net"
}
The Redirect URL can be anything for a Postman request like this. In the real world, you may be writing a web application. This app would have a callback URL that the REST API can send the token to.

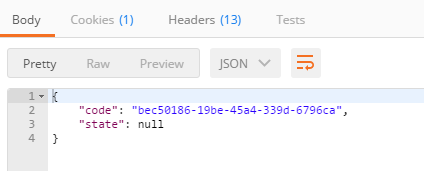
As a response, you will get a token. This token is used for all future requests in this session, so save it somewhere.
Remember, that the token is only valid for the session. You will need to generate a new token at the beginning of each session.

Challenge time! Use the documentation to figure out what to do next. Retrieve and upload some information from/to Pocket.
If you get stuck, have a look at http://www.jamesfmackenzie.com/getting-started-with-the-pocket-developer-api.
The Real World
In the real world, you can’t just do everything in Postman. It’s good for testing but too fiddly to use in production. Can you imagine giving Postman to end users?
Generally, you will use code to implement REST queries. Any language that can create web requests can support this. Common choices include Python, JavaScript, and PHP.
So, if you want to use REST in the real world, start learning to code!