Creating Snapshots in VIRL
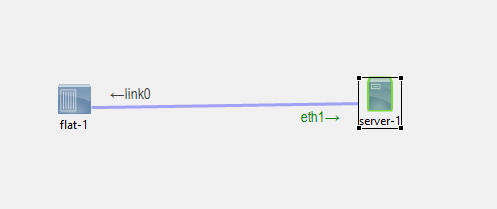
Server Node’s Limited Features
The server node in VIRL runs Ubuntu 16.04.3 LTS (in VIRL 1.5). This is fine, but there’s a lot of packages that you want to use that aren’t on this image.
For example, you might want to build a web server to test out firewall rules on an ASA, or perhaps configure a DHCP server. These packages aren’t available out of the box.
One solution is to connect your image to an external network (that is, FLAT or SNAT), and install the packages. The problem is that this takes time, as VIRL is rate limited.
A bigger problem is that these are lost when the simulation is shut down. So, you would have to run these updates for every simulation you want to start.
Fortunately, there is a better solution. Once you have the packages you need, you can create a snapshot, and use that image in future.
Big thanks are due to user alegalle over at the Cisco Learning forums for this feature.
Create the Golden Image
To start with, you’re going to need to download the updates and packages that you need at least once. This means connecting to an external network.
Once you have external access, update the repos, and install the packages you want to use.
Here are some examples:
sudo apt-get -y update
sudo apt-get -y install traceroute
sudo apt-get -y install apache2
sudo apt-get -y install bind9
sudo apt-get -y install isc-dhcp-server
When these are done, we’re ready to create the snapshot. Make sure you don’t shut down the simulation yet.
Create the Snapshot
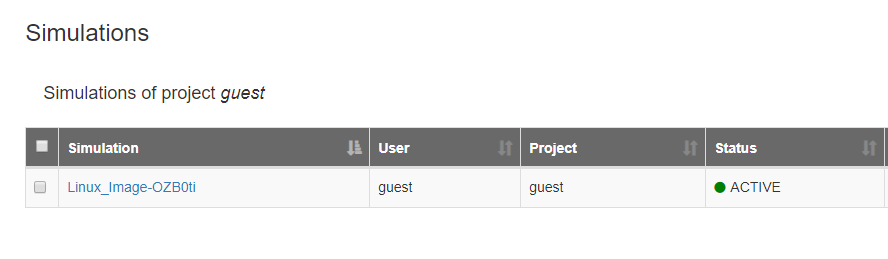
Now, log on to the UWM console, and browse to Overview. Open the running simulation:
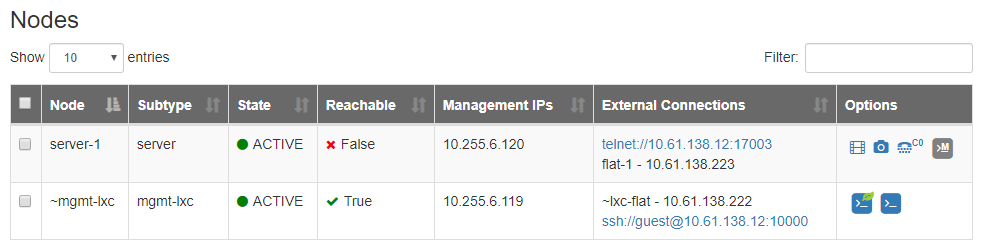
Now, find the server node that you updated, and click the snapshot icon. It’s in the Options column, and looks like a camera:
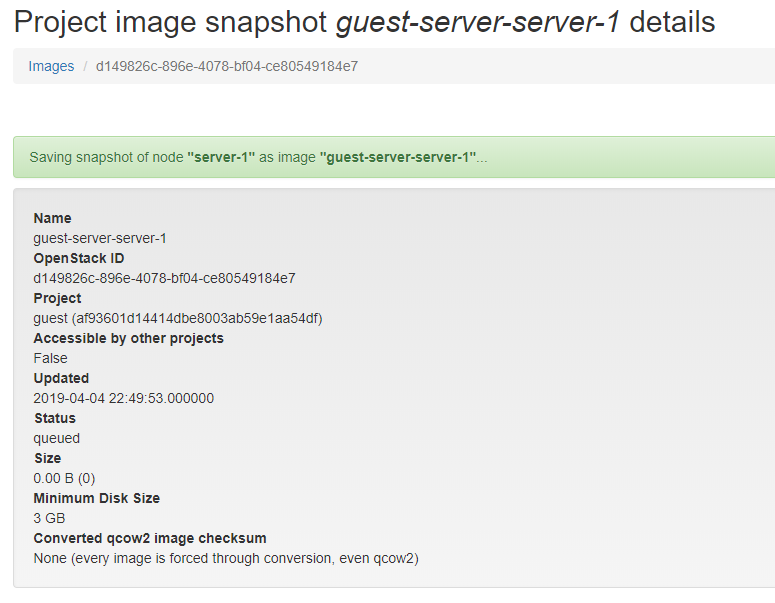
This will create the snapshot. Notice the name at the top.
Now browse to Node Resources, then to Images. At the bottom of the screen you see Image Snapshots.

If you want, you can edit the image’s name from here.
You can now safely shut down your simulation.
Using the Image in VMMaestro
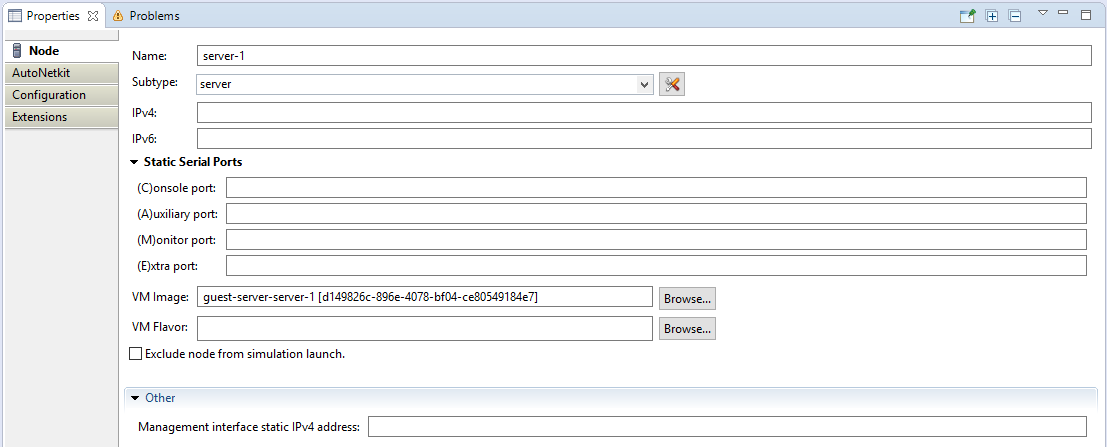
Start by opening VMMaestro, and create a new simulation. Add a server node, and go to the Properties -> Node tab.
Here you will see that there is an option to select a VM Image. Click the Browse button, and select the image that you just created.
Now when you start the simulation, your server node will have all the packages that you installed.