Packet Captures in VIRL
Last Updated: [last-modified] (UTC)
Introduction
Packet capturing in VIRL is not entirely intuitive, so this brief guide will outline how this is done.
Prerequisites:
Before beginning, make sure you have installed:
- A current version of Wireshark
- The VM Maestro client
Capturing Packets
Start the Topology
- Open the VM Maestro client
- Open a topology, or build a new one
- Start the simulation
- Wait for the simulation to start completely
Start the Capture
- Decide which interface(s) to capture traffic on
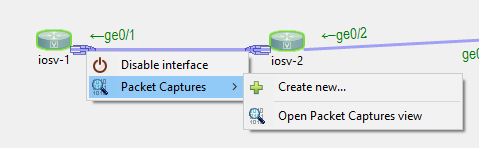
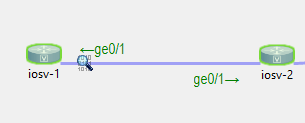
- In the simulation view, left-click the link on which the packet capture should run
- Notice that the interface ends of the link appear, as shown below
- Right click on the interface on which the packet capture should run. Go to Packet Captures, then Create New
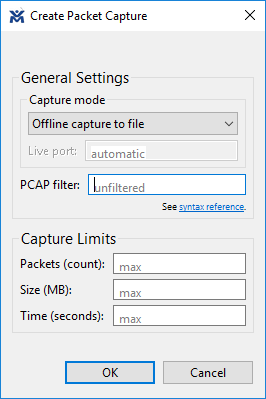
- In the Create Packet Capture window, set the options as required, or leave as default. Click OK
- The icon on the interface will change to show that the capture is running

Retrieve the Capture
- Perform whatever tests you need to generate the traffic you want to capture
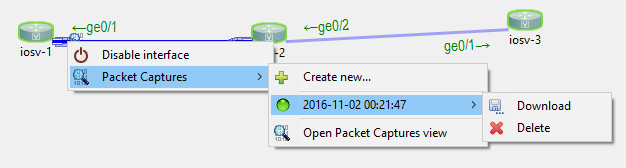
- When ready, right click the interface the capture is running on, go to Packet Captures, then go to the capture that is running, and click Download
- Select a location to download to, and click OK
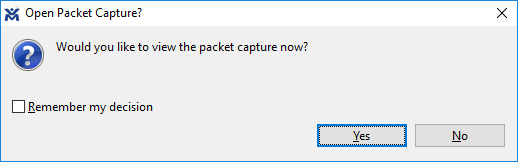
- When the Open Packet Capture dialog box appears, click Yes to view the packet capture
- The capture will automatically open in Wireshark
Review all Running Captures
- In the toolbar, click Window -> Show View -> Packet Captures
- The Packet Capture view will appear in the bottom window pane, showing all running captures
- From here, captures can be downloaded, deleted, or ‘revealed’ in the simulation viewer
The Below setup is not giving me an option to download
Do you mean that you have created a capture, but you can’t download and view it?
Under the ‘packet captures’ menu, what options do you have?