Access Control Policies in FMC
Access Control Policies, or ACP’s, are the Firepower rules that allow, deny, and log traffic.
In some ways, ACP rules are like traditional firewall rules. They can match traffic based on source or destination IP, as well as port number.
But they can go much further than that. ACP’s can evaluate contextual information. This includes the application, user, URL, traffic payload, business relevance, risk, and reputation.
ACP’s tie many other policies together. Prefilter policies, SSL policies, Identity policies, Intrusion policies, and File policies are all used by the ACP.
Unlike the traditional ASA, which had one set of rules, Firepower can use several policies. This allows a hierarchy, with a base policy at the bottom, and child policies on top.
Configuration
ACP’s can be found at Policies -> Access Control -> Acess Control.
In a hierarchy, the child policy is nested in the parent policy.
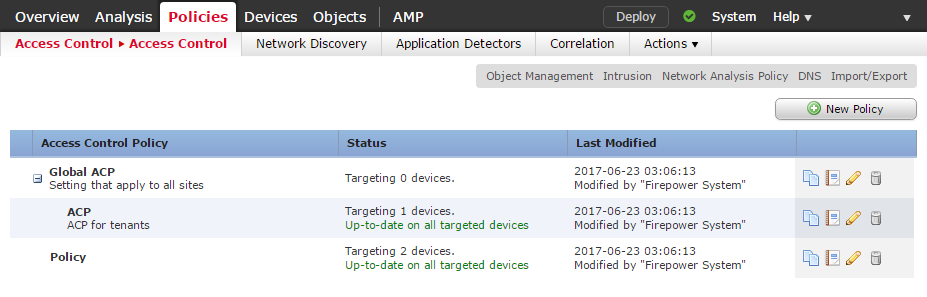
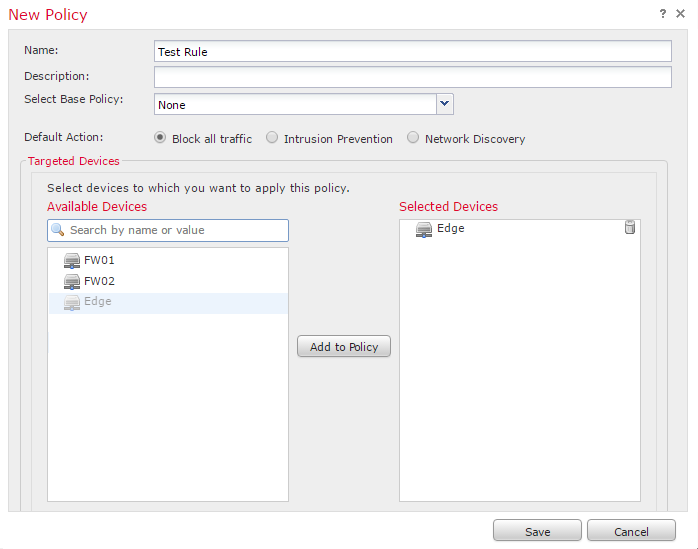
Click New Policy, and enter a Name and Description. If you have a base policy that you want to use as a parent, select it here.
The Default Action applies when traffic does not match any rules. The action depends on what you’re trying to achieve in your network. For example, an edge firewall will likely need to Block All Traffic. An internal device between networks may be use Intrusion Protection as the default.
You can choose to apply the policy to a device. This is optional at this stage and can be done later.
Top Section
At the top of the policy, extra policies may be set:
- Prefilter Policy – An ACL check that runs before the ACP evaluation. This allows or denies traffic without deep packet inspection, which may improve performance
- SSL Policy – This tells the ACP how to handle encrypted traffic. This may decrypt traffic for inspection, block encrypted traffic, or allow encrypted traffic
- Identity Policy – Used along with Realms to associate traffic with users
Apply a parent policy with Inheritance Settings. This is also where we can force child policies to inherit settings. This is so child policies can’t override the parent.
The Policy Assignment assigns this policy to a managed device.

Access Control Rules
Rules apply from the top-down. The first rule to match all conditions will ‘win’, and have the action applied. The only exception to this is if the action is Monitor. This logs the connection, and evaluation continues down the list.
TThere are two sections for rules; Mandatory and Default. These sections affect the evaluation of child policies. Child policies go between the two sections. Mandatory rules are evaluated first, then the child policy rules. Finally, the default rules.
Within these sections, you may create Categories. Categories group rules together to keep the policy organised. You cannot move categories, only delete and rename them.

- Block all traffic – Block without further inspection. This is the traditional ACL approach. Only allow through traffic that is explicitly permitted
- Trust All Traffic – Allow without further inspection
- Intrusion Prevention – Forward traffic to an Intrusion Policy for further inspection
- Network Discovery – Used for discovering users and hosts only. Does not block traffic
Next to the default action is a small icon that looks like a scroll. This is logging. We’ll cover this in more detail soon.
If the default action is an intrusion policy, a small dollar-sign icon appears. This is to specify a Variable Set. Variable sets increase the accuracy of the IPS.

Security Intelligence
Security intelligence is part of the subscription that you pay Cisco for. It consists of groups of public IP addresses known for malware, spam, exploits, and so on. Talos update these groups.
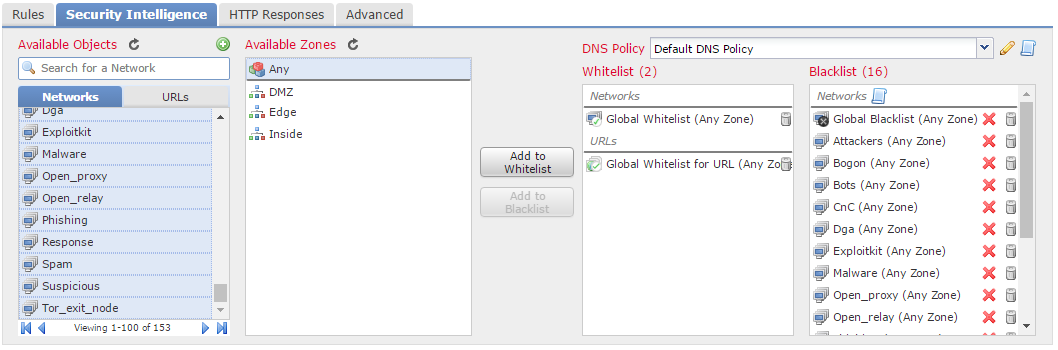
In the Security Intelligence tab, There are a list of available objects. These include the Network and URL groups that Cisco update. A good recommendation is to get all these and add them to the blacklist.
Firepower blocks any IP’s in the blacklist. The whitelist overrides the blacklist, so you should put internal resources here. This way, internal (trusted) resources cannot be in the blacklist by mistake. To be clear, this is not an allow all rule. The whitelist is only there to prevent blacklisting of items.
Above the blacklist is a logging icon. A good recommendation is to enable logging to the event viewer.
HTTP Responses
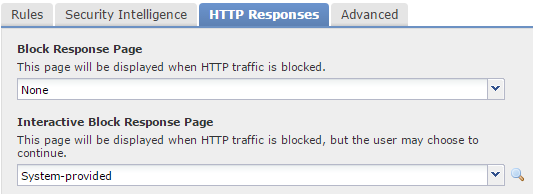
When Firepower blocks HTTP traffic, it can display a web page to the user. This an HTTP Response. This is useful so a user knows that they have been actively blocked.
If this is set to None, Firepower will send a TCP reset packet, and the user will see an HTTP 404 message. If this happens, they may think that the internet is down, and log a support ticket.
An Interactive Block Response Page allows conditional access to a site. For example, users may have an hour of Facebook time per day. When they go to Facebook, they get the interactive page. They can then accept the conditions of the corporate policy before continuing.
Rule Configuration
When adding a new rule, there are many options to choose from. This section will walk through them one by one.
Each rule has a Name and an option to enable or disable it. Next to this is the Insert field. This is where rule ordering happens. It can be at the end of the Mandatory or Defaultsections. Or, it can be before or after a particular rule number.
There are seven different actions which a rule can use:
- Allow – Allows traffic. There may yet be more inspections, such as Intrusion and File policies
- Trust – Sends traffic straight to the egress interface, without any extra inspections. Identity policies and rate limiting still apply
- Monitor – Logs traffic, and continues to the rest of the rules
- Block – Drops traffic silently, causing the connection to timeout
- Block with reset – Drops traffic, and sends a TCP FIN, so the connection closes rather than times out
- Interactive Block – Displays a web page with conditions that users may accept. This is where the Interactive Block Response Page comes into play
- Interactive Block with Reset – Combination of interactive block, with a TCP FIN
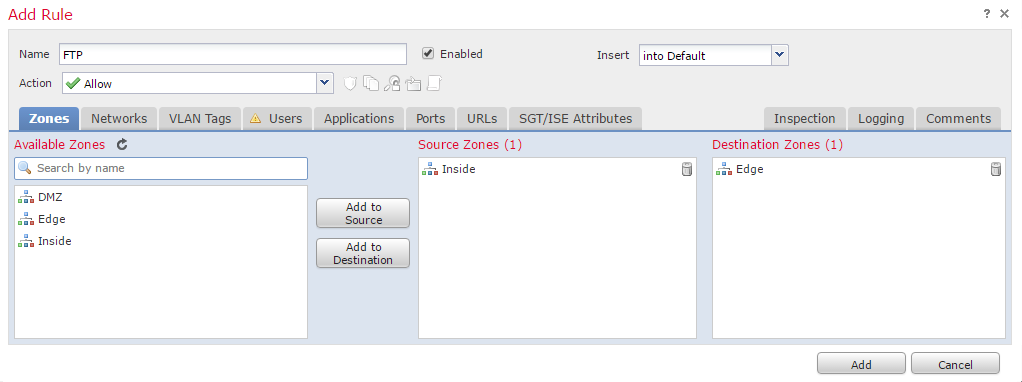
The Zones tab allows Firepower to match traffic based on the source or destination zone. Zones are objects that contain one or more interfaces. This is like specifying an interface in the old ASDM.
This is useful if a policy applies to many devices. Each device can have the same zones with the appropriate interfaces assigned.
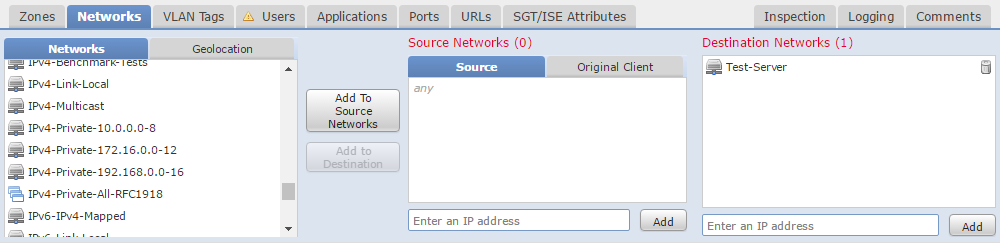
The Networks tab uses IP addresses, much like a common ACL.
Besides IP addressing, Geolocation attributes are available. This can match traffic from a particular country or region.
The VLAN tab matches traffic based on VLAN. Nothing surprising here.
If the ACP has an identity policy, the Users tab is available. If not, it will show a warning icon like the screenshot below.
This allows or denies traffic based on users or groups. This is useful if there are URL’s, that some media teams may access, and everyone else may not.
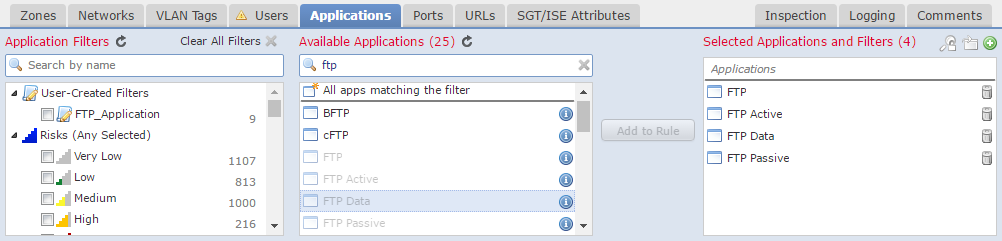
The Applications tab allows traffic matching based on the application. This is more granular than matching on a port, such as HTTP. A rule can block Facebook games, and allow other Facebook applications.
There are many predefined applications available to use. You may use an application or a category, such as risk or business relevance. If the application you need is not listed, you can define your own.
The Ports tab is exactly what you would expect. It’s where you can match traffic based on source and destination ports.
Ports can be manually added, or selected from a predefined list or custom object.

On the URL tab, we can match traffic to URL. This may use a list of specific URL’s, or category of URL’s. When using categories, you can use a reputation level.
Reputation levels range from 1 (high risk) to 5 (well known). Reputations come from Talos if you have correct licensing.
If you’re running Cisco’s ISE, you can apply tags to users and devices when they connect. For example, if a user plugs a laptop into a switch, ISE will tell the switch to tag their traffic.
The SGT/ISE Attributes tab can match traffic based on the users Security Group Tag (SGT).
The Inspection tab is where to assign the Intrusion and File policies. If traffic matches the rule, and the action is allow, then firepower evaluates these policies. These policies are optional.
If the inspections are successful, traffic will then be allowed through.

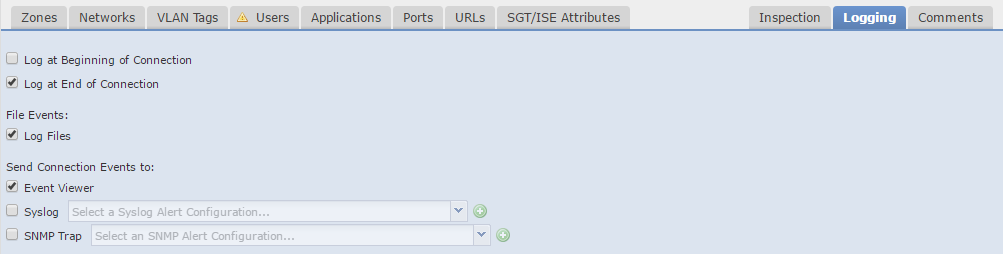
The Logging tab is critical. Each connection can log data to the event viewer. This is how we get information into the Dashboard and Analysis sections. The general rule is to log all connections unless you have a reason not to.
Besides the internal event viewer, you can use external Syslog or SNMP servers.
Logging can be at the beginning or end of a connection (or both). Logging at the end of the connection will yield the most data about the connection. Some connections take a long time (such as copying a large file). For these connections, it may be useful to log at the beginning and end of the connection. Otherwise, you will have to wait until the end of the connection to get any information.
If an action is set to Block, logging is only enabled at the beginning of the connection. This is for the simple reason that a blocked connection has no real end.
A good recommendation is to leave a comment when adding or changing rule. This makes it easier to track changes later, which is useful while troubleshooting.
After saving the policy, it will need to be deployed to an appliance for it to take effect.