
Identity and Authentication
Firepower can collect a lot of information about your network. This includes seeing the traffic individual users pass across the appliance. Also, Firepower can use user information to allow or deny access to resources.
There are two parts required to make this work; A Realm, and an Identity Policy.
A realm represents the authentication servers in your network. These may include OpenLDAP, Active Directory, or Oracle servers. Captive portal is another method of collecting user information. This method presents users with a login screen.
While this article uses Active Directory, the principles are similar for other methods.
Realms
A realm represents a group of authentication servers, such as Domain Controllers. After configuring the realm, FMC can download a list of users from the servers.
To collect enough information, configure the users with the following attributes:
- User Name
- First Name
- Last Name
- Email Address
- Department
- Telephone Number
Identity Policy
Identity policies contain identity rules. The rules associate traffic with a realm. An ACP can have one identity policy attached.
The rule is either passive or active. The passive authentication method watches traffic, and is transparent to users. Active authentication uses the captive portal method. This presents the user with a web-based login form.
Configuration
Active Directory Realm
Before starting, make sure you have covered the prerequisites:
- Create an LDAP service account in AD. Follow the normal best practices for this
- If LDAPS is used, have the certificate chain ready
- If LDAPS is used Make sure there is suitable DNS configuration for FMC to resolve the names of the AD servers
- Make sure the LDAP(S) ports are allowed through any relevant firewalls (TCP ports 389 and 636)
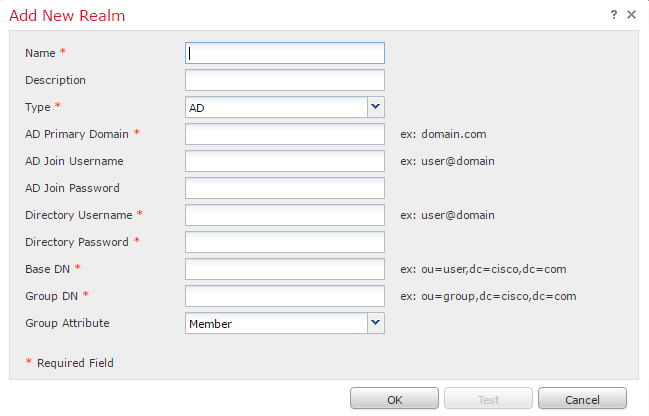
To begin, browse to System -> Integration, and click the Realms tab. Click New Realm.

Fill in the details, as appropriate to your environment. If you plan to use Captive Portal, enter the AD Join Username and AD Join Password. Otherwise, leave them blank
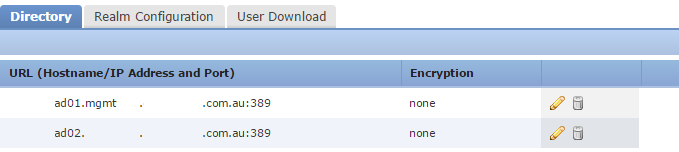
Click Add Directory. This is where we specify Domain Controllers. Enter the IP address of the server. If you’re using LDAPS, enter encryption, port, and certificate. Finally, click the test button to make sure it’s working.
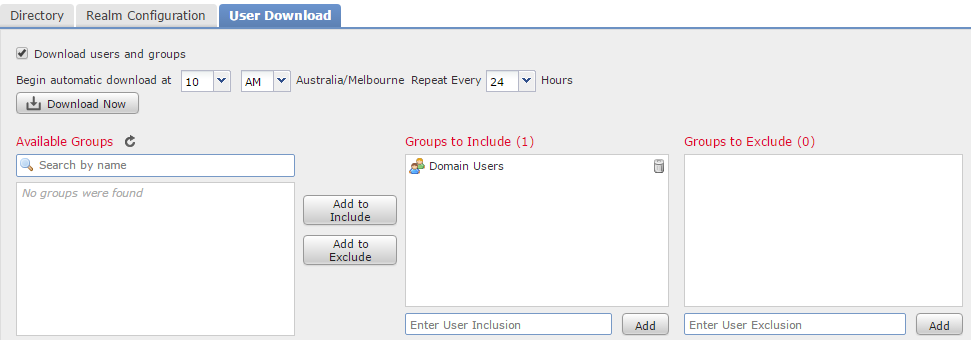
Click the User Download tab. Enable Download Users and Groups, to periodically refresh the list of users.
Add groups to include and exclude to filter the users that will be downloaded.
When all the settings are correct, save the realm configuration.
In the real list, look for the state column. Use the slider to enable this realm. Click the Download Now button to test downloading users from Active Directory.
Policy
Identity policies are located at Policies -> Access Control -> Identity.
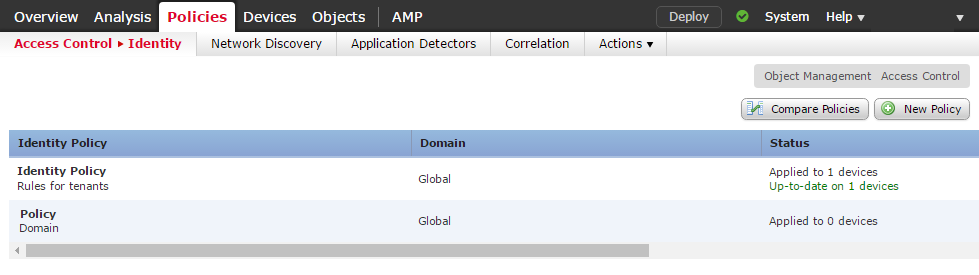
Click New Policy, and enter in a Name and Description. Alternatively, edit an existing policy. This will show a list of Identity Rules.

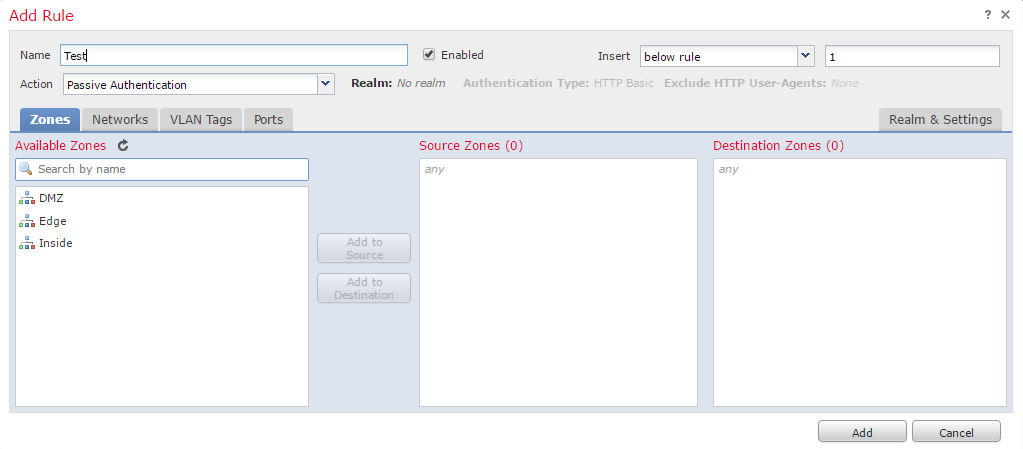
Click Add Rule, and enter a Name. Select where to insert the rule (this can be default if you’re not sure). Unless you want to use Captive Portal, select Passive Authentiction as the action.
Add any rule conditions in as required. This is how traffic is matched, to associate with a realm.
Go to the Realm & Settings tab. Select the appropriate realm from the list, and finally click Add.
Access Control Policy
To use an Identity policy, associate it with an ACP. To do this, edit an ACP, click the policy next to Identity Policy, and select the policy.
Save the policies when you’re finished configuring them. Remember to deploy them to the appliances.
Agents
Software agents can be installed on servers to help with data collection. These are Identity Sources and are passive authentication methods.
TS Agent
By default, Firepower will see traffic from a Terminal Server, and associate it with an IP address. It is unable to match traffic flows with particular users, as they all share the same IP.
The TS Agent improves this situation. The agent assigns a unique port range to each user and reports the range to user mapping to FMC. This way, FMC can associate traffic flows to each user.
There is a 199 user limit to the TS Agent. Some users may need multiple sessions, exhausting this limit faster.
The installer enables TLS 1.2 on the .NET framework and reboots the server.
User Agent
The user agent is on a client or server and is capable of logging user information when they log in and out.
User agents are for non-terminal servers.
Agent Configuration – Service Account
Browse to System -> Users, and go to the User Roles tab. Create a new role with the REST VDI permissions.
Go to the Users tab, and click Create User. Enter a username and password, and add the user to the REST VDI role.
TS Agent Installation
Before trying to install the agent, make sure that there is a REST VDI service account created. Also, make sure that the server with the agent can access FMC over port 443.
Start by downloading the TS Agent. When ready, run through the installer. At the end of the installation process, the Terminal Services Agent window opens.
If the server has more than one NIC, select the one to monitor. Unless you have a reason to change them, leave the ports at their default settings.
Enter the FMC server information, using the service account you created earlier. Click the Test button, and a green tick icon should appear.
Save the config, and reboot the server when prompted.