Juniper (JNCIA) Labs
Labs
The labs below accompany the Introduction to Juniper video series.
Patreon Access
The labs provided here are available to Patreon supporters of this site. Your support helps with the creation of new content.
Additional Resources
Also check out:
Juniper vLabs
The labs here are based on Juniper's vLabs. These are free to anyone with an account, which you are able to sign up for (even if you're not a Juniper customer yet).
In addition to the guide here, you can download Juniper's vLabs User Guide.
Signing Up
For a new account, see Juniper's Sign-up guide. This can sometimes take a while for them to setup.
Selecting a Lab
After signing in, head over to the Juniper vLabs topology page. Here you will see a list of topologies to choose from.
For example:
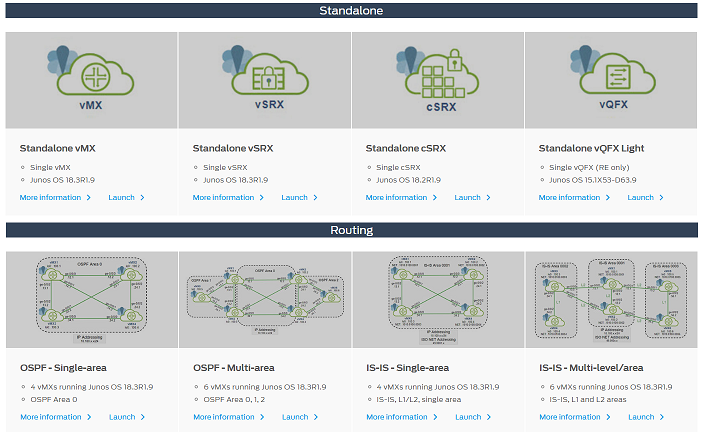
Each of the labs in this series will be based on one of these. Find the one you want, and click launch.
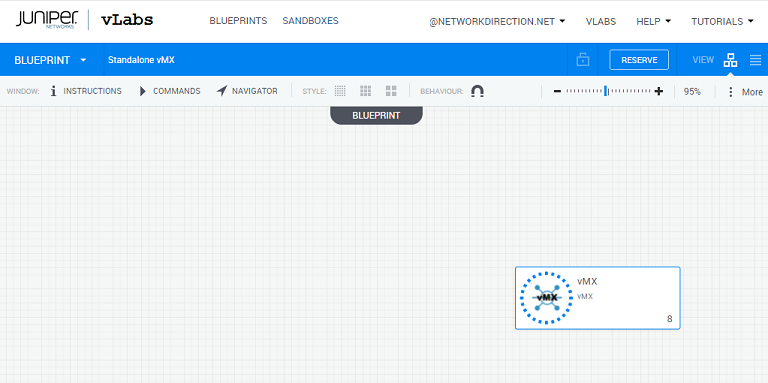
A new screen, called the blueprint, opens.
Starting the Lab
In the blueprint screen, you will see one or more device, similar to the screenshot below.
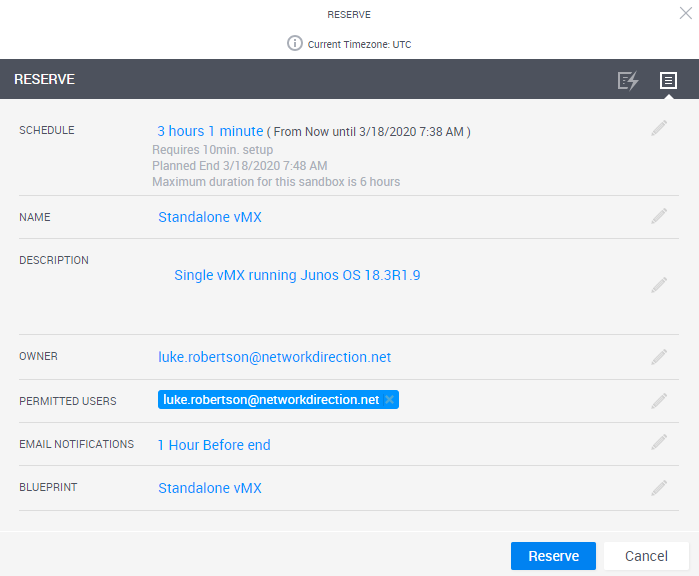
In the top right of the screen, click on the Reserve button. This will bring up the 'reserve' screen. From here, click the Reserve button.
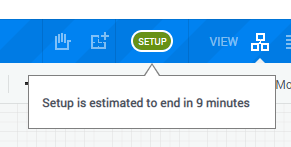
vLabs will now start up your topology. This will take a while, so please be patient.
A single router, like in the example above, may take around 10 minutes. A larger topology with four routers may take around 15 minutes.
Connecting to Devices (Web Browser)
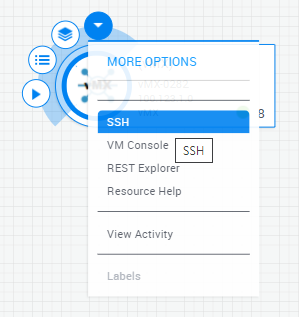
Once the lab has been loaded, hover your mouse over the device you want to connect to, and extra menu options appear.
Now hover over the down-arrow to get a connection menu.
Click SSH. A new tab will open with the Junos CLI.
Connecting to Devices (SSH)
We can use Putty (or another terminal emulator) to SSH directly to the lab. First, we need to add your internet IP to the vLabs firewall.
- Find your public IP (eg, Google 'my ip')
- In the vLabs toolbar, click commands
- Click the '>' arrow next to Add Allowed Network Prefixes
- Enter your IP and click run (this will take about 30 seconds)
- Repeat this for each device you want to access
- Each device has a green circle to show it is online; Hover your mouse over this
- Use Putty to SSH to the IP and port listed here (the IP and port will also be listed here)
- login with jcluser and Juniper!1 (this is also emailed to you)
Ending the Lab
When you're finished, click the hand icon in the top right to begin the teardown process.