FMC Getting Started Guide
If you’re new to Firepower Management Centre before, you might find it a bit intimidating. This is especially true if you’re used to configuring ASA’s with ASDM.
This article is going to give you a place to get started. We’ll start by getting FMC 6.2 virtual edition running. Then, we’ll work on setting up some basic policies.
In this article, we’ll run through these steps:
- Deploy the FMC virtual appliance
- Configure Licensing
- System Configuration
- Configure a Health Policy
- Install Updates
- Configure an Access Control Policy
- Add a Device
At the end of the article, there is a Where to Next? section. This has ideas for extra policies and configuration that you may need next.
Deploy FMC
Before starting, allow relevant ports through any existing firewalls you may have. Here are some recommendations:
- TCP/443 – This is for the FMC web console
- UDP/53 – For FMC DNS lookups
- TCP/8305 – So FMC can communicate with managed devices
- TCP/43 – So FMC can perform WHOIS lookups
- TCP/32137 – FMC connection to the AMP cloud and Threat Intelligence
To deploy FMC, follow Cisco’s deployment guide. It’s pretty straight-forward, so we’re not going to rehash it all here.
Configure Licensing
There are two types of licenses; Classic and Smart. Different devices use different license types. Here’s the quick overview:
- FMC – Use smart licenses
- Threat Defence – Use smart licenses
- ASA with Firepower Services – Use classic licenses
Smart Licensing
Smart licenses require a Smart Licensing account to be set up. Cisco have a guide on how this is done. As part of this, you may need to convert classic licenses to smart licenses.
Make sure that you’re happy with converting licenses before you start. Smart licenses cannot convert back to classic licenses without logging a support ticket.
Once you have a smart account ready, you need to register it in FMC:
- Login to the Smart Software Manager
- Browse to Liccense -> Smart Software Licensing
- Click the Inventory tab
- Click New Token
- Copy the token to clipboard
- Enter the details, and click Create Token
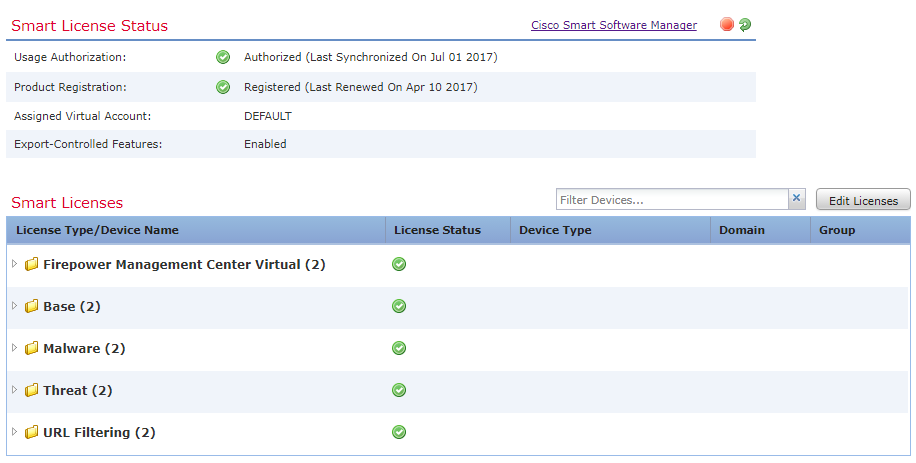
- Go to FMC, and browse to System -> Licenses -> Smart Licenses
- Click Register
- Paste in the token, and Apply Changes
- Your Smart Licenses will be listed in the table
Classic Licensing
Classic licenses use the traditional PAK method. These licenses need to be manually added to FMC. To do this:
- Get the PAK/license file from Cisco
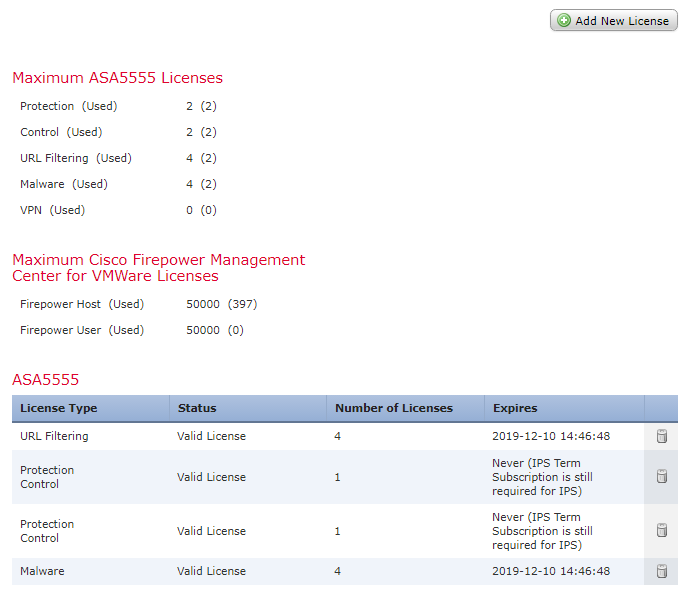
- System -> Licenses -> Classic Licenses
- Click Add New License
- Copy contents of license file in here, and click Submit License
System Configuration
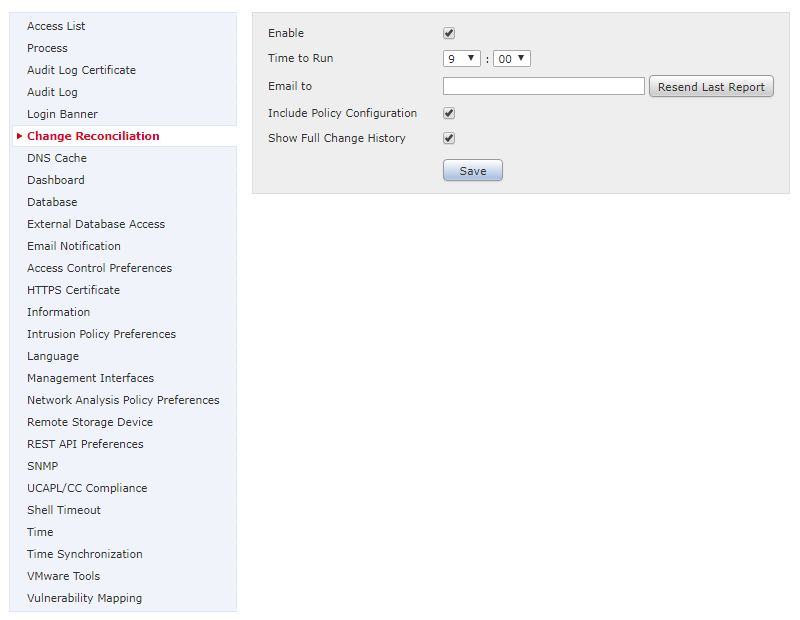
Basic FMC settings are in System -> Configuration. The categories are in a list down the left side.
What you apply here is up to you. Consider settings these options:
- Access-list – IP’s that can access FMC
- Change Reconciliation – Email a report of changes on a regular basis
- Email Notification – SMTP settings
- Access Control Preferences – When changing rules, this requires adding comments to the changes
- Name – Server name
- Management Interfaces – Set hostname and DNS servers
- Time Synchronization – NTP settings
Health Policy
FMC and managed devices both use health policies. If you want, you can have one policy for everything.
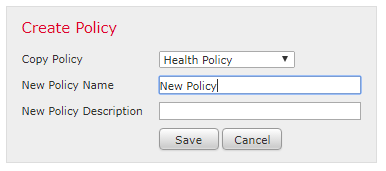
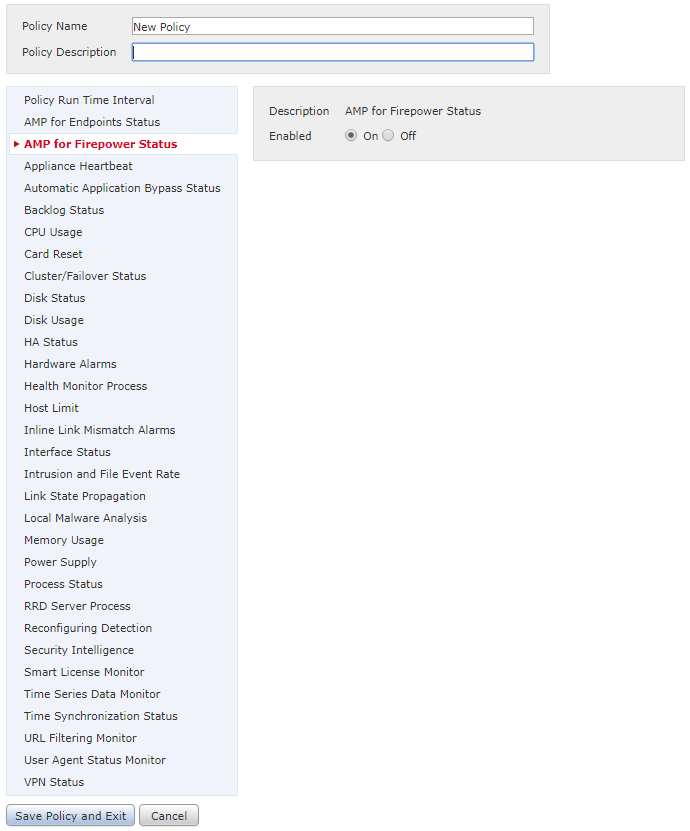
- System -> Health -> Policy
- Enter a Name and Description
- Set the policy options as you see fit
- Save the policy and exit
- Click the green check box to apply the policy
Consider enabling these settings:
- AMP for Firepower (if licensed)
- Hardware alerts (CPU, disk, memory)
- HA alerts (if HA is used)
After applying the policy, browse to System -> Health -> Monitor to see the current status.
Install Updates
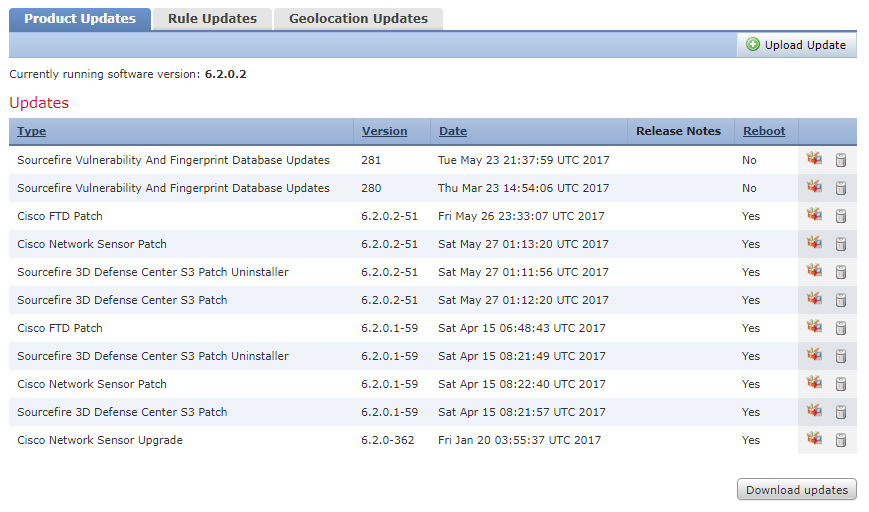
Browse to System -> Updates, and you will see that there are three types of updates. These are:
- Product Updates – Updates for FMC, appliances, and the vulnerability database
- Rule Updates – Updates for IPS rules
- Geolocation Updates – Updates for the Geolocation IP database
In the Product Updates tab, click Download Updates to get the latest updates from Cisco. Or, download them from Cisco’s download site, and click click Upload Update.
When there are updates to install, click the install icon next to it. Best practice is to run the pre-install checks first. When you’re happy, install the update. Devices may reboot during the update process.
Go to the Rules Updates tab. Run a one-time update for now. This will take a while to run. Also, configure regular updates to allow this to happen transparently.
Go to the Geolocation Updates tab. As before, run a one-time update, and then schedule regular updates.
To see the update progress, click the Status icon, between the Deploy button and the Status tab.
Access Control Policy
Each device needs at least an Access Control Policy (ACP). At it’s simplest, the ACP provides firewall rules. In a more advanced deployment, it is also used to tie extra security policies together.
For now, we’ll look at creating a basic policy to get started with.
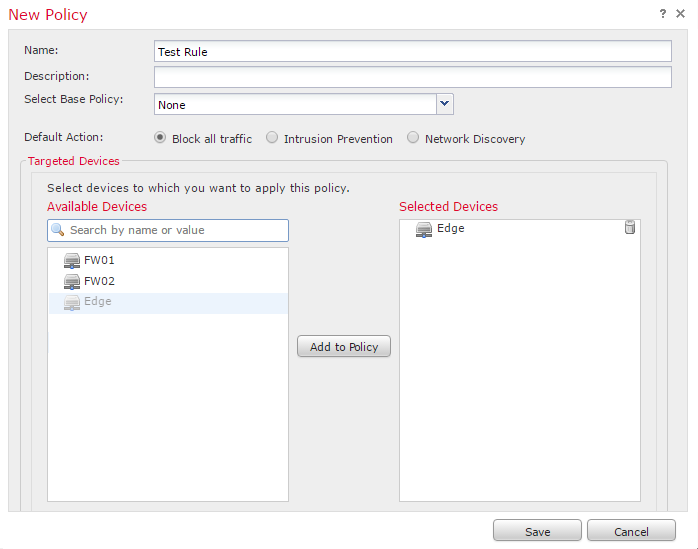
Browse to Policies -> Access Control, and click New Policy. Enter a Name and Description for the policy.
Leave the default action as Block all Traffic for now. This means that the policy will not allow any traffic, unless it’s explicitly allowed.
There will be no devices to add in yet, so leave them empty. Save the policy.
Add a Device
There are two parts to adding devices to FMC. Configuring the device, and configuring FMC.
Device Configuration
- Logon to the Firepower CLI of the device
- Enter configure manager add x.x.x.x key
- x.x.x.x is the IP address of FMC
- key is a password that you choose
- Log out of the CLI
FMC Configuration
- Browse to Devices -> Device Management
- Click Add -> Add Device
- Enter this information:
- Host – IP of the device
- Display Name – Name of the device (this will appear in FMC)
- Registration Key – The password defined earlier on the CLI
- Group – Leave as ‘none’ for now. This is optional, and can be added later
- Access Control Policy – Specify the empty policy created earlier
- Select the licenses that apply to this device
- Click Register. FMC will add the device. This will take a while, so be patient